Bathroom Fan Rattling Sound? Fast Troubleshooting Guide
Quick Answer (Most Likely Cause)
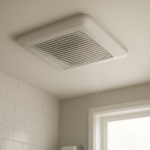
A rattling bathroom exhaust fan is most often the grille cover or fan housing vibrating against the drywall/ceiling due to loose springs, a slightly warped grille, or a housing that isn’t firmly fastened to framing. First action: with the fan off, press the grille up gently and see if the rattle stops when held tight. If you notice loose electrical wiring, a burning smell, or the housing visibly shifting, stop using the fan and schedule a technician.
Identify the Noise First
Use the fan’s timing to separate “vibration transfer” from motor or airflow issues. These patterns strongly point to a loose grille or housing contacting drywall:
Startup rattle (first 1–3 seconds): the fan’s initial torque shakes a loose grille spring or a housing edge that’s barely touching the ceiling cutout.
Steady running rattle: constant vibration is being amplified by drywall contact or a slightly loose mounting bracket.
Intermittent rattle: changes in vibration as the fan warms up can make a loose grille or housing shift and “tick” against the ceiling.
After installation: common when the housing wasn’t secured to framing on all required points or the drywall cutout is tight and touching the housing.
After cleaning: frequent when the grille is reinstalled slightly skewed, springs aren’t seated, or the grille is bent and touches the ceiling unevenly.
Speed-specific resonance: on multi-speed fans, one speed may match the ceiling’s resonance and make a minor looseness sound severe.
Structural vibration (you feel it in the ceiling): suggests the housing is transferring vibration into drywall rather than the noise coming only from inside the fan.
If the sound is a smooth low hum (not a rattle) or a whooshing/whistling (air-related), you may be dealing with a different issue. This guide stays focused on grille/housing vibration against drywall.
What This Noise Usually Means
The fan creates small, constant vibrations. A properly installed bathroom fan isolates most of that vibration in the housing and framing. When the grille isn’t clamped evenly, the spring clips are loose, or the fan housing is touching the drywall cutout, those vibrations turn into a rattle because two surfaces are repeatedly contacting each other: grille-to-ceiling, housing-to-drywall, or bracket-to-framing. Drywall acts like a sounding board, so a tiny gap or a slightly loose fastener can sound much louder than it is.
Most Common Causes (Ranked by Probability)
Grille springs not fully seated
What happens: one spring isn’t hooked into the correct slot or is partially engaged.
Symptom clue: rattle changes or stops when you press the grille upward; one side looks slightly lower.
Why it creates this noise: the grille vibrates and taps the ceiling because it isn’t held under even tension.
Grille cover slightly bent or warped
What happens: the grille frame is flexed from removal/cleaning or overtight handling.
Symptom clue: one corner touches the ceiling while another has a visible gap; rattle may sound like a “buzz.”
Why it creates this noise: uneven contact points chatter against the drywall with every vibration cycle.
Loose fan housing fasteners to framing
What happens: mounting screws/nails or a bracket is slightly loose, allowing the housing to move.
Symptom clue: you can feel the housing tremble through the grille; the ceiling area around the fan feels like it’s vibrating.
Why it creates this noise: the whole unit shakes and transfers vibration into the drywall opening, creating a rattle at the cut edge.
Housing rubbing the drywall cutout (too-tight hole or shifted housing)
What happens: the metal/plastic housing edge contacts drywall continuously or at one point.
Symptom clue: rattle is loudest at one side; pressing the housing/grille slightly sideways changes the sound.
Why it creates this noise: direct contact turns normal fan vibration into a tapping/buzzing resonance through the ceiling.
Grille not centered; edge-to-drywall contact
What happens: grille is installed rotated/off-center so it touches the drywall on one side.
Symptom clue: grille appears “crooked” relative to the ceiling; rattle stops if you re-seat it straight.
Why it creates this noise: the grille frame repeatedly knocks the ceiling, especially at certain fan speeds.
Missing or loose blower plate/cover screws (no internal disassembly required to suspect)
What happens: an internal cover plate may be loose and transmitting vibration to the grille area.
Symptom clue: pressing different points on the grille changes the sound location; noise seems to come from a specific corner.
Why it creates this noise: vibration travels to the nearest rigid contact point, which is often the housing edge at the drywall.
Drywall around the opening is cracked or unsupported
What happens: the drywall edge flexes because the cutout is oversized or the gypsum is damaged.
Symptom clue: small cracks or crumbly drywall at the opening; rattle reduces when you support the area with gentle hand pressure.
Why it creates this noise: the ceiling itself becomes the vibrating part, buzzing against the grille or housing edge.
Fan housing damper flap tapping due to housing movement (vibration-triggered)
What happens: a backdraft damper can chatter if the housing is shaking or misaligned at the outlet collar.
Symptom clue: a rhythmic light tapping that changes when you lightly steady the grille/housing; often worse when the unit first turns on.
Why it creates this noise: a vibrating housing makes the flap oscillate and tap, and drywall contact amplifies it.
How to Check Safely Before Calling for Service
Turn the fan off and wait for the grille to stop moving before touching anything.
Press-test the grille: turn the fan on, then gently press the grille upward with flat fingers. If the rattle stops or changes dramatically, the issue is almost certainly grille tension or housing-to-drywall contact.
Check for a crooked grille: with the fan off, look for uneven gaps around the grille perimeter. Re-seat it so it’s centered.
Inspect spring clip tension: remove the grille (usually by pulling down slightly and compressing the springs) and confirm both springs are inserted into matching slots and fully engaged.
Look for bends/warping: place the grille on a flat surface. If it rocks, it’s bent; a replacement grille is often the cleanest repair.
Inspect the drywall opening edge (visual only): look for scrape marks, shiny rubbed areas, loose paper, or cracking that suggests the housing is contacting the cutout.
Check for housing movement through the opening: with the grille removed and power left off, gently touch the visible rim of the housing (do not reach into wiring). Excess movement suggests loose mounting that a technician should correct.
Confirm the grille isn’t loaded with lint that makes it sit unevenly. Clean and fully dry it before reinstalling.
Listen for speed-related resonance: if you have more than one speed, note which speed rattles most. Resonance points to a small looseness rather than a major failure.
Check for recent changes: painting the ceiling, new drywall work, or reinstalling the grille after cleaning often explains why contact/rattle started.
If the fan is in a rental or under warranty, stop at the grille and visual checks and request service. Housing mounting corrections may require attic access and proper fastening.
Avoid electrical disassembly, rewiring, or opening the motor compartment. If the housing mounting is loose, a technician can secure it to framing and add vibration isolation where appropriate.
Normal Operating Sound vs Warning Signs
Normal: a consistent, smooth airflow sound and a mild, steady fan noise that doesn’t change when you lightly touch the grille.
Likely grille/housing vibration (usually repairable without replacing the fan): a rattle/buzz that stops when you hold the grille tight, changes when you shift the grille slightly, or appears after cleaning or recent installation.
Warning signs that justify stopping use and scheduling service:
New noise that is suddenly much louder than before, especially after no recent handling.
Noise getting louder over weeks along with increasing ceiling vibration.
Performance change: noticeably weaker suction paired with new vibration (can indicate mounting shifted and is stressing the housing/outlet connection).
Speed instability: the fan surges, cycles, or changes pitch unpredictably (not typical for a simple loose grille).
Burning smell, hot plastic odor, or discoloration around the grille or ceiling opening.
Housing visibly shifting or a ceiling crack worsening around the fan opening.
When Professional Service Is Recommended
The housing is loose (movement felt at the rim) or the ceiling opening shows damage that may need reinforcement.
The rattle persists after properly seating the grille and confirming spring engagement.
The drywall cutout is too tight and the housing is rubbing; correcting this may require careful trimming and re-securing to prevent future contact.
You suspect mounting problems from installation (especially in a new remodel), since correct fastening to framing and proper bracket use are best verified by a technician.
Any electrical concern: arcing sounds, intermittent power, burning odor, or visible wiring issues.
Attic access is required to tighten mounting points or stabilize duct/outlet connections without stressing the housing.
Ask for a “bath fan vibration/rattle inspection” and specify that the noise changes when pressing the grille. That detail helps the service provider focus on mounting and contact points first.
How to Prevent This Problem
Reinstall the grille carefully after cleaning: seat both spring clips evenly and center the grille so it doesn’t touch drywall on one side.
Replace a warped grille instead of forcing it flat; a bent frame tends to return to the same rattle position.
Keep the grille and perimeter clean: lint buildup can prevent full seating and create uneven contact.
During renovations, ensure the ceiling cutout is correctly sized and not pinching the housing.
If you notice minor vibration early, address it promptly; ongoing rubbing can degrade drywall around the opening.
Use the correct replacement grille for the fan model so spring tension and fit are correct.
Have mounting checked after a new installation if the fan is noticeably louder than expected; securing the housing properly prevents drywall resonance.
Related Fan & Ventilation Noise Problems
Bathroom fan buzzing only at one speed (resonance vs loose grille contact)
Bathroom fan rattles after cleaning the cover (spring clip seating issue)
Bathroom fan vibration felt in ceiling but airflow seems normal (housing-to-drywall contact)
Bathroom fan ticking sound that stops when you press the grille (grille frame chatter)
Bathroom fan clicking on startup only (housing shifting at torque)
Bathroom fan sounds louder after remodel or paint (cutout size or grille fit changed)
Bathroom fan grille won’t sit flush (bent grille or wrong replacement part)
Bathroom fan makes a light tapping that comes and goes (vibration-triggered flap chatter)
Bathroom fan rattles only when door is closed (pressure changes amplifying loose contact)
Bathroom fan suddenly loud but no visible damage (mounting fastener loosened over time)
Bathroom fan hum vs rattle confusion (how to tell vibration transfer from motor hum)
Bathroom fan cover vibrating against ceiling texture (uneven contact on textured drywall)
Conclusion
Most bathroom fan rattling is not a motor failure—it’s the grille cover or fan housing vibrating against the drywall because it isn’t seated, centered, or firmly mounted. Start with the press-test and a careful grille re-seat, then inspect for signs of housing-to-drywall rubbing. If the housing moves, the drywall is damaged, or any electrical symptoms appear, schedule a professional inspection to secure the unit correctly and stop the vibration transfer.
Frequently Asked Questions
Is a rattling bathroom fan dangerous to run?
If it’s a loose grille or housing vibrating against drywall, it’s usually not dangerous, just noisy and potentially damaging to the ceiling edge over time. Stop using the fan and book service if you smell burning, see discoloration, notice erratic speeds, or the housing feels loose enough to shift.
How much does it cost to fix a bathroom fan rattle from a loose grille or housing?
Grille-related fixes are often low-cost (reseating springs or replacing a grille). Housing mounting corrections typically cost more because a technician may need attic access to re-secure the unit to framing and eliminate drywall contact. Exact pricing depends on access and whether drywall repair is needed.
What’s a good temporary fix if the grille is rattling tonight?
Reseat the grille and ensure both spring clips are fully engaged and centered. If pressing the grille stops the noise but it returns, the grille may be bent and due for replacement. Avoid stuffing materials into the opening or adding anything that could contact the fan wheel or affect airflow.
How can I tell electrical motor hum from grille/housing vibration?
A vibration rattle/buzz usually changes or stops when you press the grille or steady the housing edge. Electrical hum is typically smoother, doesn’t change much with light pressure on the grille, and may be accompanied by speed instability or unusual heat/odor. If you suspect electrical issues, schedule service.
Do I need to replace the whole bathroom fan if it’s rattling?
Not usually. If the noise is from a loose grille, warped cover, or housing-to-drywall contact, repair is commonly limited to reseating/replacing the grille or securing the housing properly. Replacement is more likely if a technician finds internal damage that can’t be stabilized or if correct mounting can’t be achieved with the existing housing.
Why did the rattle start right after I cleaned the fan cover?
Cleaning often involves removing the grille, and the rattle commonly starts when the springs are reinserted into the wrong slots, only one spring is fully seated, or the grille is reinstalled slightly crooked. Re-seat the springs evenly and center the grille to restore uniform tension against the ceiling.
There’s a strange comfort in seeing the same story play out without the usual fog—no dramatic twist, just the straightforward move that makes the whole thing easier to live with. The next time the issue pops up, it won’t feel like a cliff edge.
What’s left is quieter: fewer mental reroutes, less second-guessing, more room for normal days to take over. Relief isn’t loud, but you’ll notice it in the way the hours start to cooperate.